

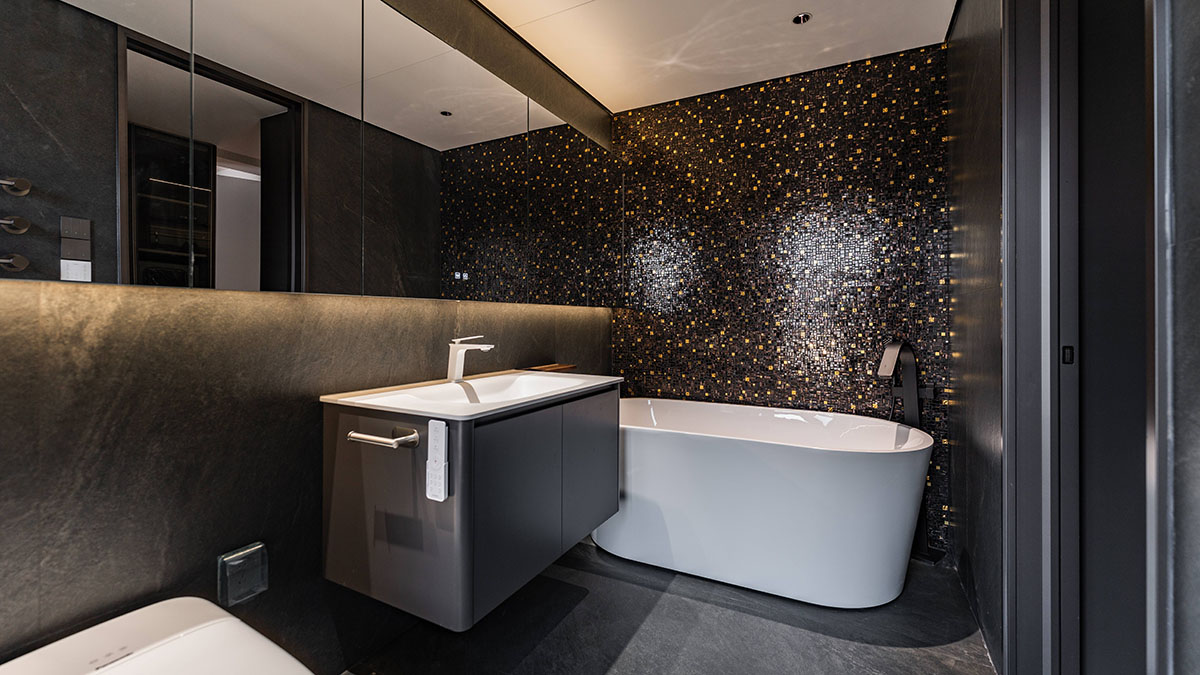
Tiling with glass mosaic tile brings light, color, and depth to kitchens, bathrooms, and swimming pools. Its reflective surface can brighten a small backsplash or turn an entire wall into a striking design feature.
However, glass requires careful installation. Its smooth, nonporous surface needs a compatible adhesive, while translucent tiles can reveal uneven mortar, trowel marks, and changes in backing color. Small differences in spacing can also make individual mosaic sheets stand out.
This guide covers the process from preparing the surface and choosing materials to setting the sheets, grouting, and removing the final haze.
What to Know Before Installing Glass Mosaic Tile
Transparent and Opaque Glass Behave Differently
Some glass mosaics are transparent or translucent, while others are opaque or have a colored backing. With translucent products, the adhesive beneath the tile influences the finished appearance.
White mortar is commonly recommended because it provides a consistent background, particularly beneath white, pale, and translucent glass. Always confirm the tile manufacturer’s requirements and make a small sample using your chosen tile, adhesive, and grout.
Understand How Your Mosaic Sheets Are Mounted
Glass mosaic tiles are commonly supplied in several mounting formats:
- Mesh-backed sheets: The mesh sits behind the tiles and faces the setting material.
- Paper-faced sheets: Paper holds the tiles together from the front and faces outward during installation.
- Film-faced sheets: A clear film holds the tile faces together and is removed according to the manufacturer’s instructions.
Paper-faced mosaics generally require paper removal while the adhesive is firm enough to hold the tiles but still allows adjustment. Do not assume paper and clear film follow the same removal schedule.
Confirm Suitability for the Location
Choose glass mosaic tile specifically approved for its intended use. Wall suitability does not automatically mean a product is suitable for floors, shower floors, outdoor exposure, or permanent immersion.
For flooring, check the manufacturer’s traffic and slip-resistance guidance. For pools, verify that the glass, backing, mounting adhesive, and installation system are suitable for submerged use.
Tools and Materials You Will Need
Prepare everything before mixing adhesive so you can work without interruptions.
| Tool or material | Purpose |
|---|---|
| Manufacturer-approved glass tile adhesive | Bonds the mosaic to the prepared surface |
| Compatible grout | Fills the joints between tiles |
| Suitable notched trowel | Distributes adhesive evenly |
| Margin trowel and mixing bucket | Mixes and handles mortar |
| Rubber grout float | Seats sheets evenly and applies grout |
| Level, straightedge, and layout tools | Maintains alignment and a flat surface |
| Wet saw with a glass-rated diamond blade | Makes controlled straight cuts |
| Glass mosaic nippers | Trims individual pieces where appropriate |
| Suitable diamond hand pad | Smooths cut edges |
| Utility knife | Cuts mesh between tiles |
| Clean sponges and microfiber cloths | Cleans tile faces and grout residue |
| Compatible flexible sealant | Finishes designated movement joints |
| Safety glasses and suitable gloves | Protects against sharp glass and cutting debris |
Grout sealer may also be needed, depending on the grout product selected.
Preparing the Surface
Start with a Flat, Stable Base
Flexible mosaic sheets follow the shape of the surface beneath them. A small ridge or depression can create uneven tiles or visible lines between sheets.
The substrate must be structurally sound, clean, and suitable for the installation system. Repair low spots and surface defects with an appropriate preparation material before setting the tile. Do not rely on extra adhesive beneath individual sheets to correct an uneven wall.
Remove dust, grease, loose paint, wallpaper, and other materials that could interfere with bonding.
Waterproof Wet Areas Correctly
Glass tile and grout do not replace waterproofing.
Showers, tub surrounds, and other wet installations need a suitable water-management system beneath the tile. Cement backer board alone should not be treated as a waterproof barrier.
Pools and fountains require a system approved for continuous immersion. Steam rooms also need appropriate vapor management. Confirm compatibility between the substrate, membrane, adhesive, and glass mosaic before starting.
Plan the Layout Before Mixing Mortar
Dry-lay several sheets and check the overall pattern. Mark a level reference line and a vertical starting line on the installation surface.
Adjust the layout to avoid awkward slivers at exposed edges. Where practical, aim for balanced cuts at opposite ends.
Check that the gaps between sheets match the gaps within each sheet. Consistent spacing helps the finished surface read as one continuous mosaic.
Choosing the Right Adhesive and Grout
Use an Adhesive Approved for Your Glass Tile
Select an adhesive compatible with the exact glass product, its backing, the substrate, and the installation location.
A white polymer-modified mortar approved for glass tile is a common choice. However, resin-backed, coated, or specially mounted mosaics may require a different adhesive.
Pools do not universally require epoxy adhesive. Approved cement-based systems can also be suitable for submerged glass tile installations. MAPEI, for example, lists specific mortar-and-additive combinations for pool applications. Mapei
Avoid choosing an adhesive solely because its packaging says “water-resistant” or “tile adhesive.”
Match the Grout to the Surface and Joint Width
Unsanded grout is often suitable for narrow joints and scratch-sensitive glass, provided the joint width falls within the grout manufacturer’s stated range.
Some fine-aggregate and other grouts are also approved for glass mosaics. Test the selected grout on spare tiles before installation, especially with glossy, coated, or iridescent finishes.
Epoxy grout can offer strong stain resistance, but it is not automatically suitable for every glass tile. Compatibility and application requirements still matter.
Choose Grout Color with a Finished Sample
Grout color changes the visual character of a mosaic:
- Matching grout creates a quieter, more continuous surface.
- Light contrasting grout highlights darker tiles and brightens the pattern.
- Dark contrasting grout emphasizes individual shapes and joint lines.
Use a cured sample to judge the result. Wet grout may look different from its final color.
Choose a factory-produced color or an approved color system. Do not add ordinary pigments or colorants unless the grout manufacturer specifically permits them.
How to Install Glass Mosaic Tile Step by Step
1. Dry-Lay and Mark Your Reference Lines
Arrange the sheets to check color distribution, pattern direction, and cuts. If the product has intentional variation, blend sheets from different boxes as recommended.
Mark reference lines that remain visible as you work. For wall installations, check that the starting line is level rather than assuming the countertop or floor is perfectly level.
2. Mix the Adhesive as Directed
Measure the specified amount of water or additive and follow the mixing instructions.
Some mortars require a resting period, known as slaking, followed by remixing. Others do not. Follow the product directions rather than using a fixed resting time for every adhesive.
Do not add extra water to revive mortar that has started to stiffen.
3. Spread a Small, Manageable Area
Use the flat side of the trowel to press adhesive into the prepared substrate, then comb it with the specified notch.
There is no universal 4 mm finished adhesive thickness for glass mosaics. Trowel notch size and the thickness beneath a seated tile are different measurements.
Choose the trowel and application method specified for the tile and adhesive. For translucent mosaics, the approved method may require flattening the ridges to create a uniform setting bed.
Spread only as much adhesive as you can cover within its working time. If the surface skins over, remove it and apply fresh material.
4. Place and Seat the Sheets
Position each sheet against the layout lines. Use a clean rubber float to apply gentle, even pressure across the sheet.
Avoid pressing individual pieces too deeply or striking glass directly with a hammer.
Periodically lift a freshly placed sheet to check adhesive transfer. The backs of the tiles should have the coverage required by the installation system, without large voids.
5. Keep Sheet Joints Consistent
Check each new sheet against the surrounding tiles. The sheet perimeter should not become visible as a wider or narrower grout line.
Use spacers where helpful, and adjust individual pieces while the adhesive remains workable. A straightedge and light viewed across the surface can reveal uneven areas.
Remove excess mortar from joints before it hardens, leaving sufficient depth for grout.
6. Remove Face Paper at the Specified Time
For paper-faced mosaics, dampen the paper with a clean wet sponge when the manufacturer instructs.
Allow the paper to soften, then peel it away gently at a low angle. Adjust displaced pieces while the adhesive remains workable.
Do not wait automatically until full cure, and do not apply the same timing to film-faced products.
7. Cut and Finish the Edges
When possible, cut the mesh between tiles to fit a sheet without cutting the glass itself.
For cuts through glass, use equipment and a blade specifically suited to the product. Glass mosaic nippers may help with small adjustments.
Smooth sharp cut edges with a suitable diamond hand pad. Test the cutting method on spare pieces before making visible finish cuts.
8. Allow the Adhesive to Cure
Wait for the adhesive manufacturer’s specified time before grouting.
Temperature, humidity, tile backing, and the installation system can affect curing. A surface that feels dry does not necessarily mean the mortar underneath has cured sufficiently.
Protect the installation from movement and water during this stage.
9. Apply the Grout
Ensure the joints are clean and ready to receive grout.
Using a suitable rubber float, work diagonally across the mosaic to pack the joints fully. Remove excess grout with the float held at a steeper angle.
Work in manageable sections, particularly with epoxy or rapid-setting grout, so cleaning can be completed within the required window.
Keep designated movement joints free of rigid grout. Finish them with the specified flexible sealant.
10. Clean the Surface Without Washing Out the Joints
Follow the grout manufacturer’s cleaning schedule. A fixed waiting time is not appropriate for every grout or site condition.
Use a well-wrung sponge and clean water where the product instructions permit. Wipe gently and change the water frequently.
Avoid excessive water, aggressive scrubbing, or repeated washing that could weaken or discolor fresh cement-based grout.
Epoxy grout requires its own cleaning procedure. Complete all cleaning stages before residue hardens.
11. Seal Only If Required
Glass tile itself generally does not require sealing.
Some cement-based grouts benefit from a compatible penetrating sealer, while others do not require one. Epoxy grout generally does not need sealing.
Follow the grout and sealer instructions for curing time and application. Sealing does not turn grout into a waterproofing layer.
Common Glass Mosaic Installation Mistakes
Visible Trowel Lines
Translucent glass can reveal ridges and voids beneath the surface. Prevent this by using the approved mortar application method and checking a sample before completing the installation.
Excess Adhesive in the Joints
Too much mortar or excessive pressure can force adhesive into the joints. This reduces space for grout and may create uneven coloration.
Control the amount applied and clean the joints while the mortar is fresh.
Visible Outlines Around Each Sheet
A grid of sheet outlines usually points to inconsistent spacing, alignment, or setting depth.
Check the work continuously rather than waiting until the entire wall is covered.
Using Untested Grout
A grout that works well on ceramic tile may scratch a particular glass finish. Test the actual product and application method on spare material first.
Grouting or Filling a Pool Too Soon
The time required before grouting is not necessarily the same as the time required before water exposure.
For pools, follow the complete system’s specified waiting period before filling.
Omitting Movement Joints
Corners, perimeters, and other designated locations need appropriate movement accommodation. Ordinary grout joints do not replace movement joints.
Frequently Asked Questions
Can I Cut Glass Mosaic Tile with a Manual Tile Cutter?
Some manual cutters are designed to cut certain glass tiles, but many standard ceramic tile cutters are unsuitable for small glass mosaics.
Use a method approved for the product. A wet saw fitted with a glass-rated blade is a common option for straight cuts; suitable glass nippers can help with individual pieces.
Can Glass Mosaic Tile Be Used on Floors?
Yes, if the specific product is rated for that floor application.
Check traffic suitability, slip resistance, and wet-area approval. Small tile size and frequent grout joints do not automatically make every glass mosaic safe for a shower floor.
What Grout Joint Width Should I Use?
Follow the tile manufacturer’s recommended joint width and maintain the intended spacing within the sheets.
There is no single standard width that applies to all glass mosaics. Match the selected grout to the actual joint dimensions.
Is Epoxy Grout Required for a Swimming Pool?
Not always. Some cement-based grouts are approved for submerged installations when used within the specified system and allowed to cure fully. MAPEI lists both unsanded and fine-aggregate cement-based grout options in its glass pool tile installation guidance.
Choose based on compatibility and project requirements, rather than assuming every cement-based grout will fail underwater.
How Do I Remove Grout Haze from Glass?
Complete the initial cleanup within the grout manufacturer’s recommended window. Light residue may be removable with a clean, soft cloth after the appropriate drying period.
For persistent haze, identify whether the residue is cement-based or epoxy, then use a cleaner approved for both the grout and the glass finish. Test it in an inconspicuous area first.
Avoid abrasive pads or unapproved chemicals, especially on coated and iridescent glass.
A Lasting Finish Starts Beneath the Tile
Successful glass mosaic installation depends on a flat substrate, a compatible setting system, consistent spacing, and careful cleaning.
Before starting the full project, prepare a small sample with the actual tile, adhesive, and grout. It is the most useful way to check color, surface compatibility, and the finished appearance—and to resolve problems before they reach the wall.